If you remember the Easter chicks from last year you’ll know I have a thing for turning a Creme Eggs into something else for Easter, this year it’s lambs!
You will need:
Creme Egg
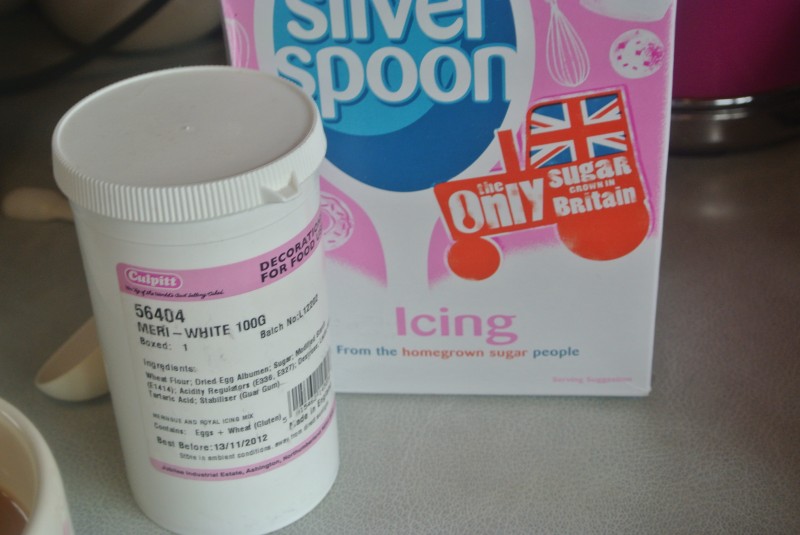
Sugarpaste; white, peach/flesh/pink, black plus green and pink for flowers and leaves
Royal icing
Piping bag and no. 2 piping tip
I’m setting my little lambs on mini cake cards, depending on what you want to do with them after you’ve made them they can be made on a plate, a small piece of card covered in foil or a small square of baking paper. Just make sure you’re making them on something that you can easily move around.
Greasing your hands with a little bit of Trex (white vegetable fat) will stop the sugarpaste from sticking to you whilst you’re working and give the sugarpaste a nice shine, not too much though or it will end up super shiny!
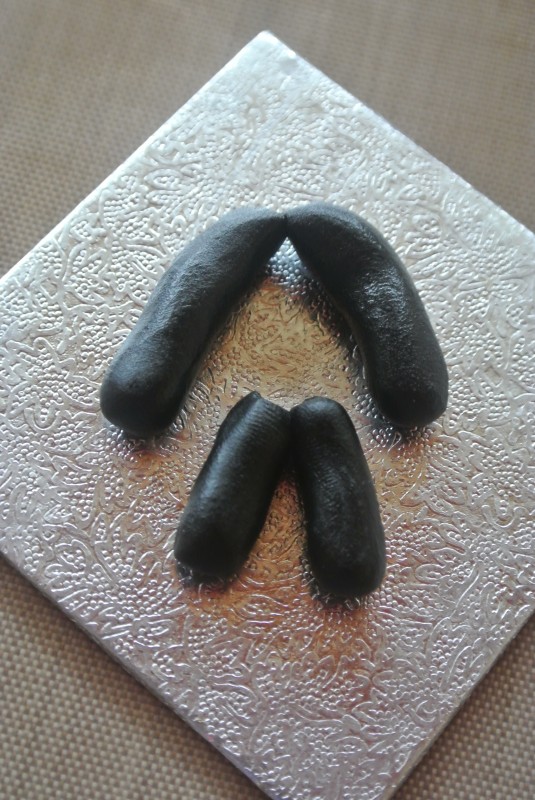
Roll a sausage of black sugarpaste, flatten the two ends and cut it in half. Position on the covered card as front legs.
Roll another sausage, slightly longer and fatter and do the same for the back legs.
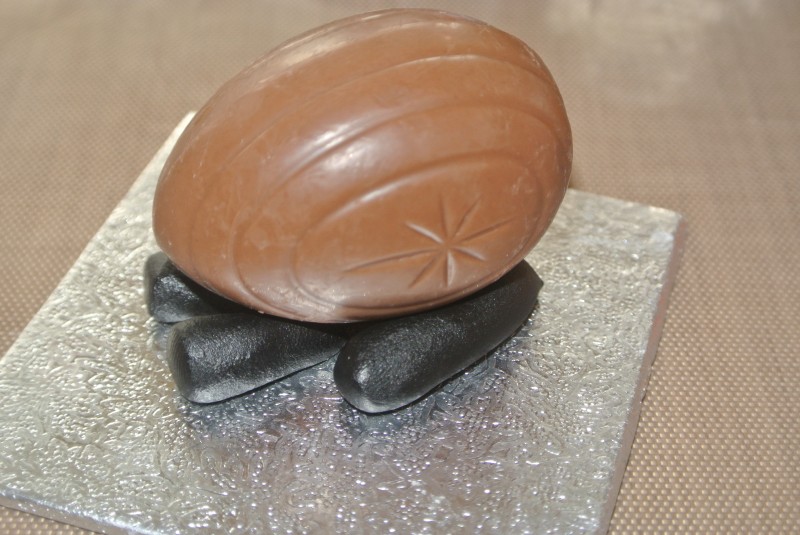
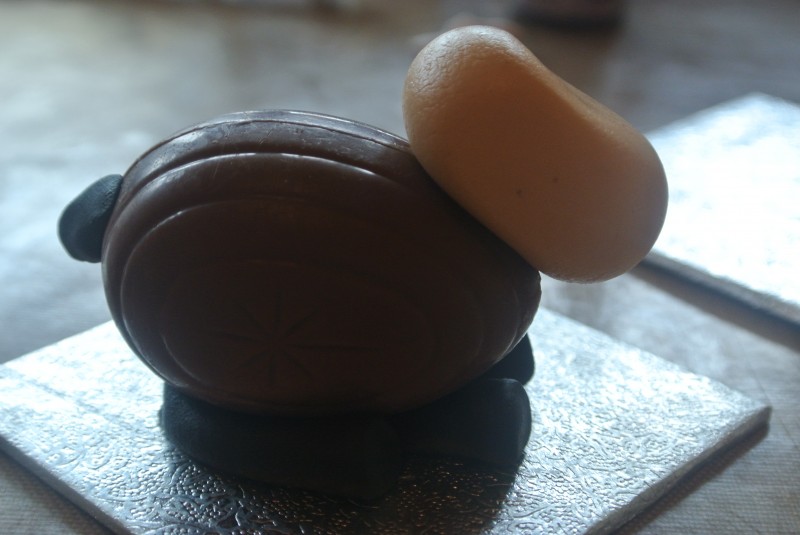
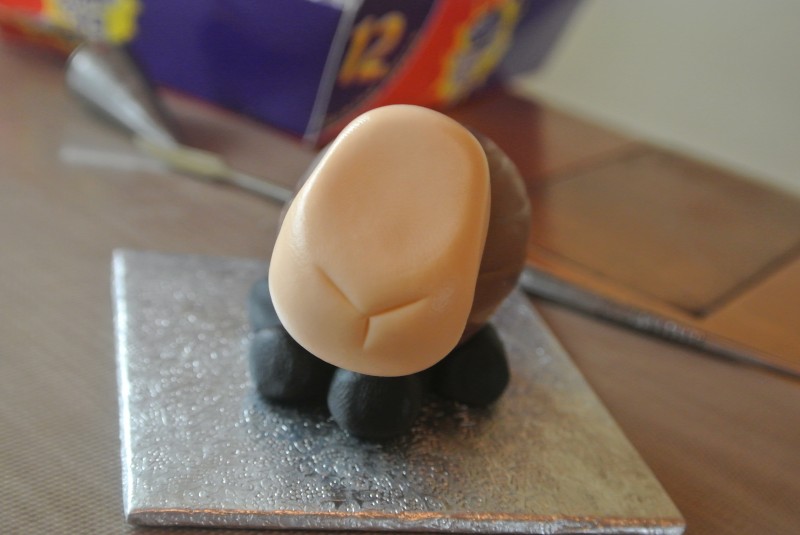
Now unwrap the chocolate egg and press it onto the legs.
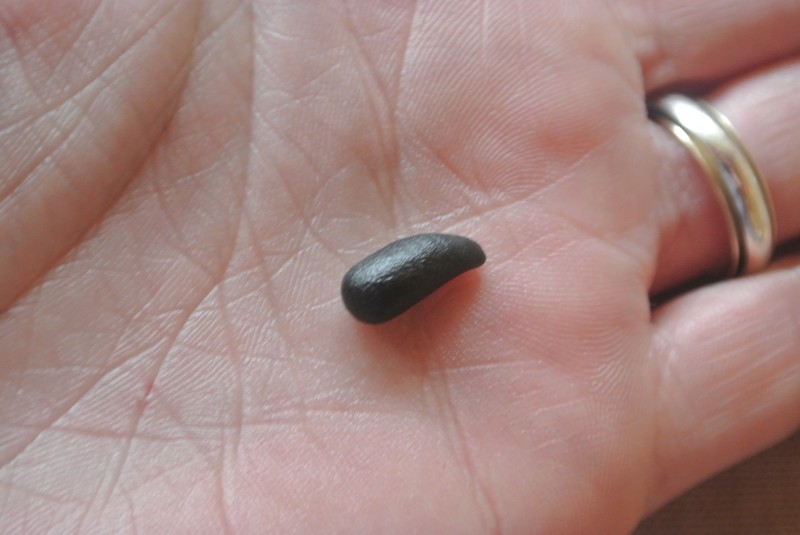
Roll a small amount of black to shape a tail.
Press it into position. The sugarpaste should stick easily without the need for any sugar glue or water.
Wash your hands really well before shaping the head, the black colouring is easily transferred to your hands and will make Mr Lamb look like he has a dirty face!
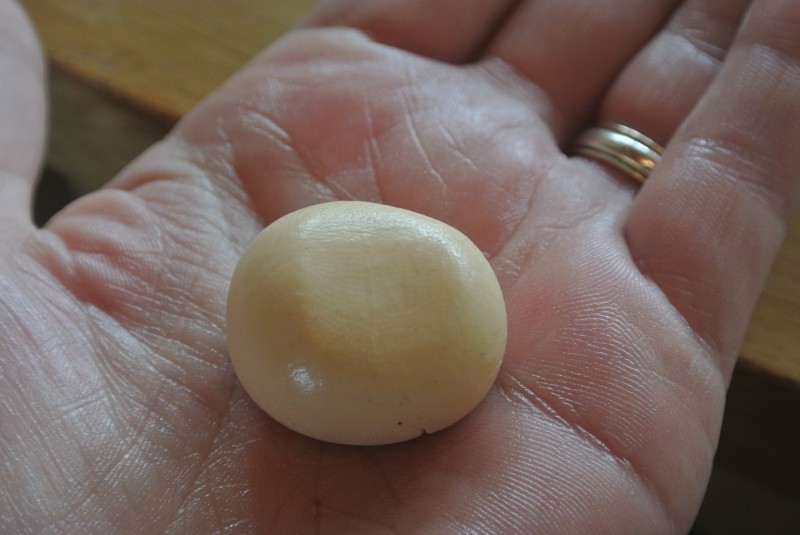
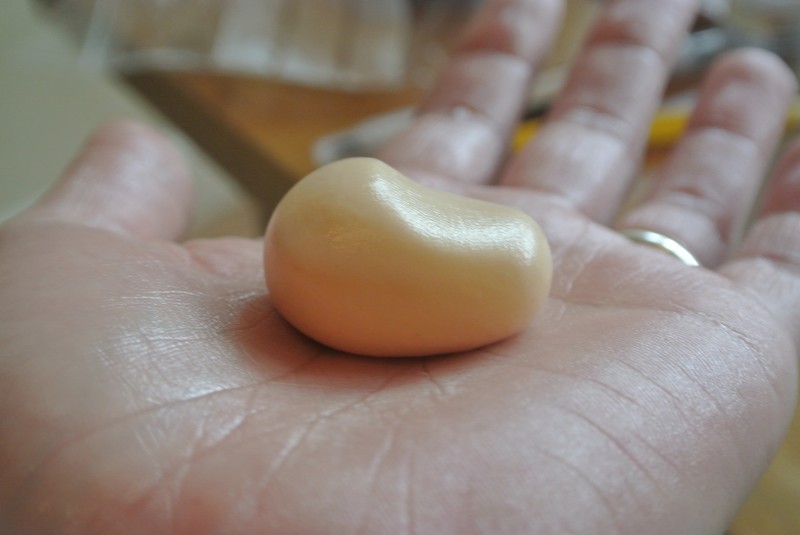
Roll a ball of peachy/flesh/pink sugarpaste. I coloured my own using the ivory from the
Wilton set.
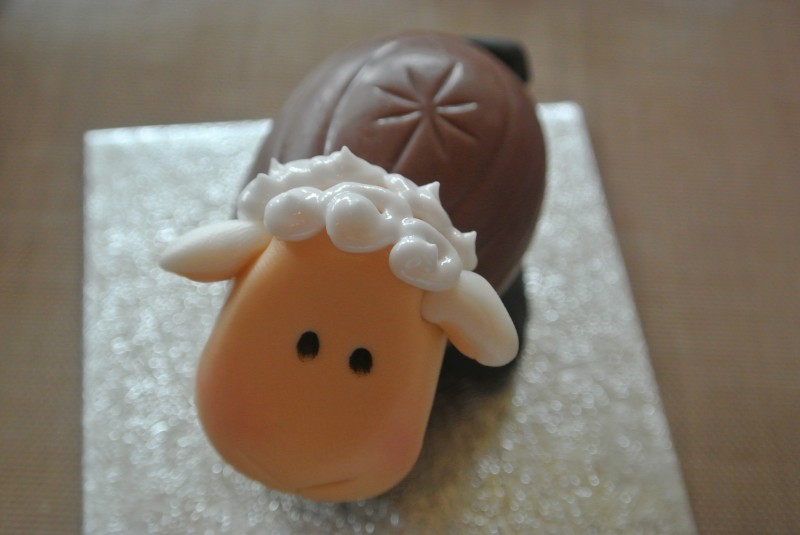
Once it’s in a neat ball, roll your forefinger across the middle of the ball. It will flatten it in the middle and form this shape.
Squidge the thinner flatter end slightly with your fingers – this part is the top of the head and should be narrower than the mouth part.
Now press the head gently into position.

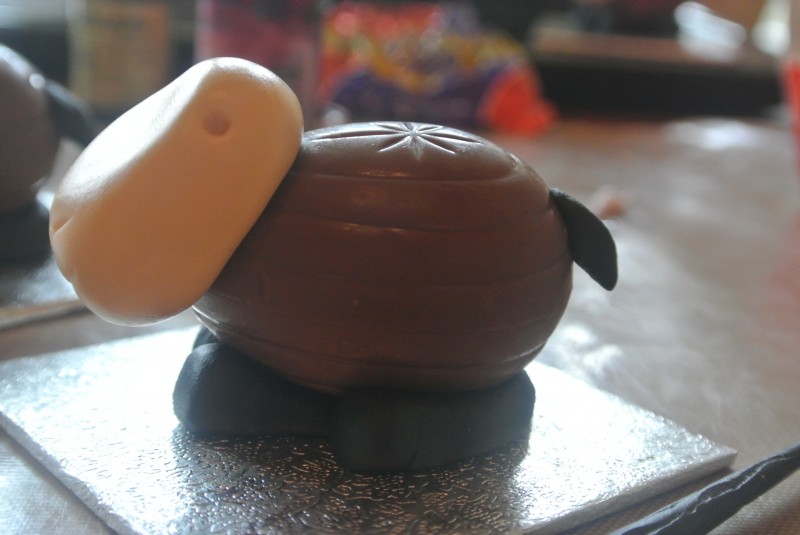
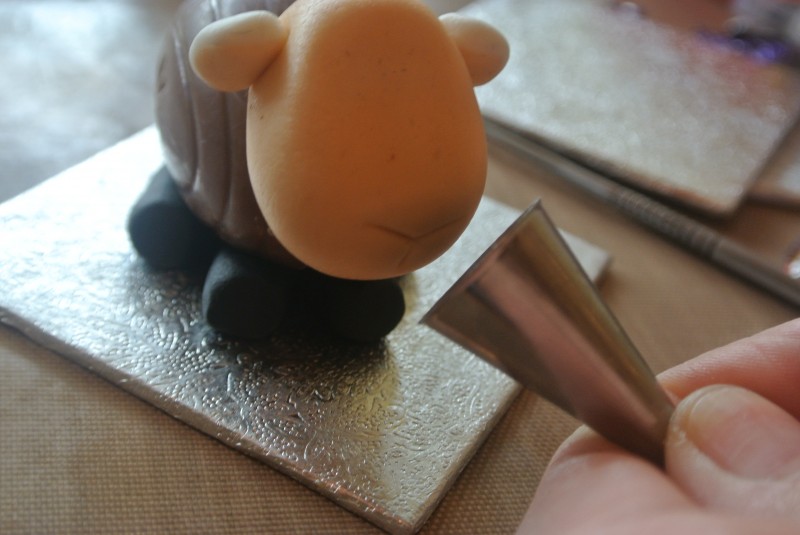
Using the wrong end of a paintbrush poke a hole on either side of Lamb’s head where the ears will go.

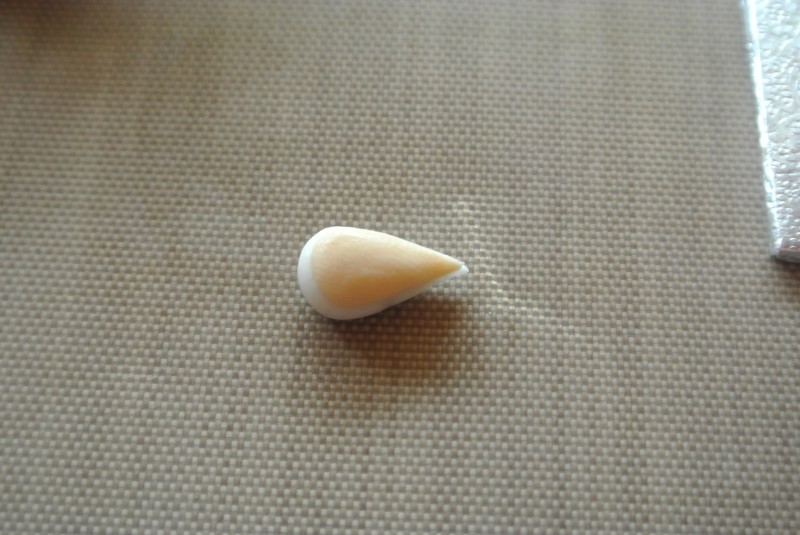
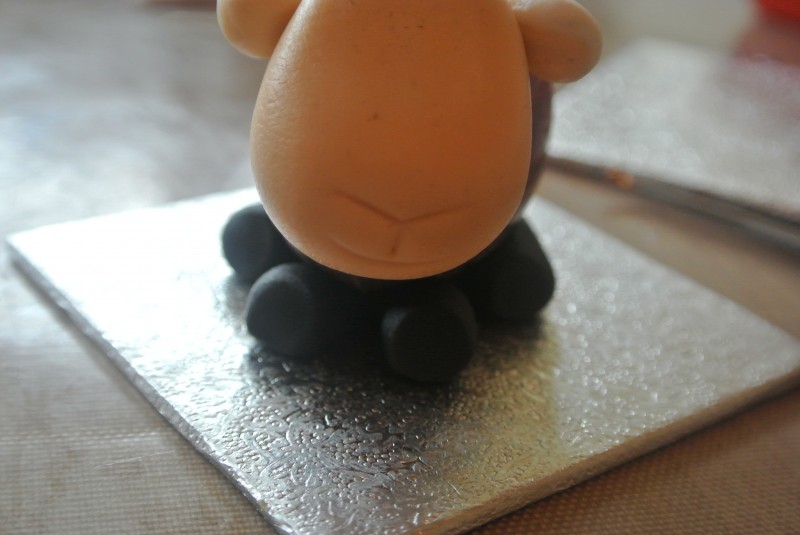
Roll a small ball of white sugarpaste and an even smaller ball of flesh. Set them on top of each other ball and press them gently together.
Taper the end of the ear to a thin point.
The thin end gets posted into the little hole you made earlier and the ears droop downwards with the white part uppermost. Press lightly into the hole and to the head to secure in place.
Now using a knife imprint Lamb’s nose in a v-shape with a line going downwards.
Add an imprint of a smile with the wrong end of a piping tip.
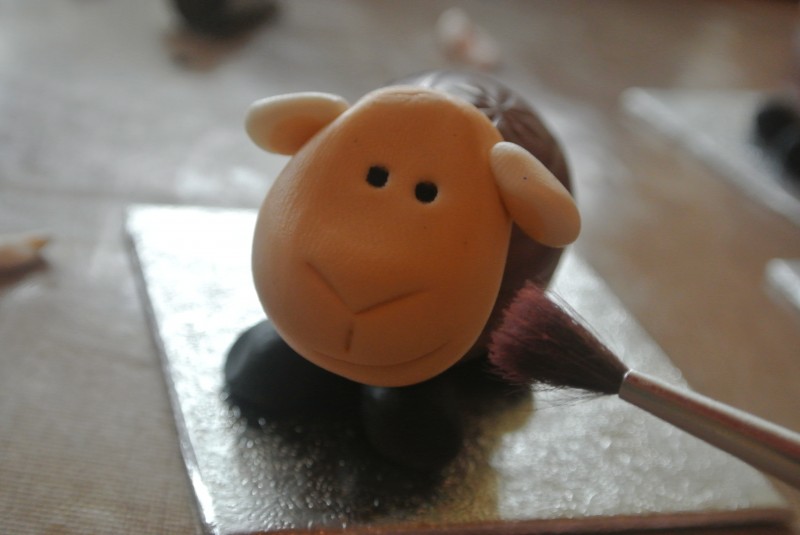
Two dots with the black icing pen make the eyes.
And a dust of pink lustre dust for rosy cheeks.
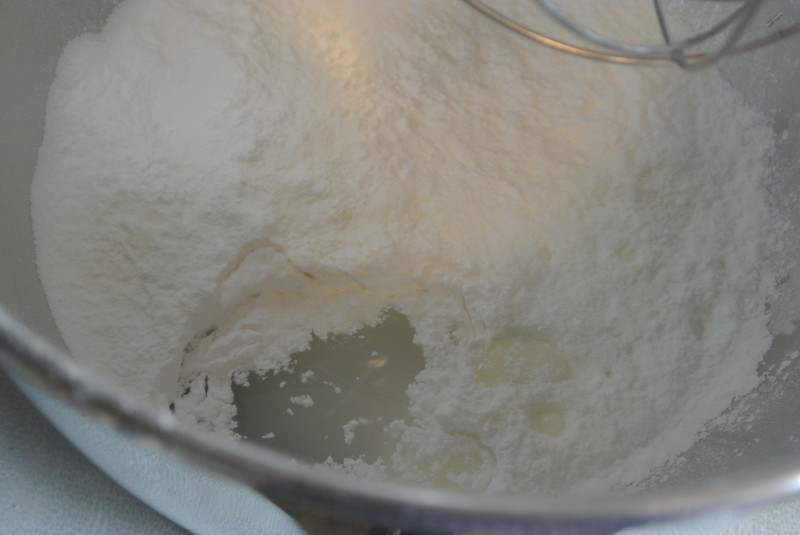
Now for the royal icing. I prefer to make my own mix using regular icing sugar and meri-white (a powdered egg white) – 450g icing sugar, 1 tbsp
meri-white and between 60-90ml water added gradually.


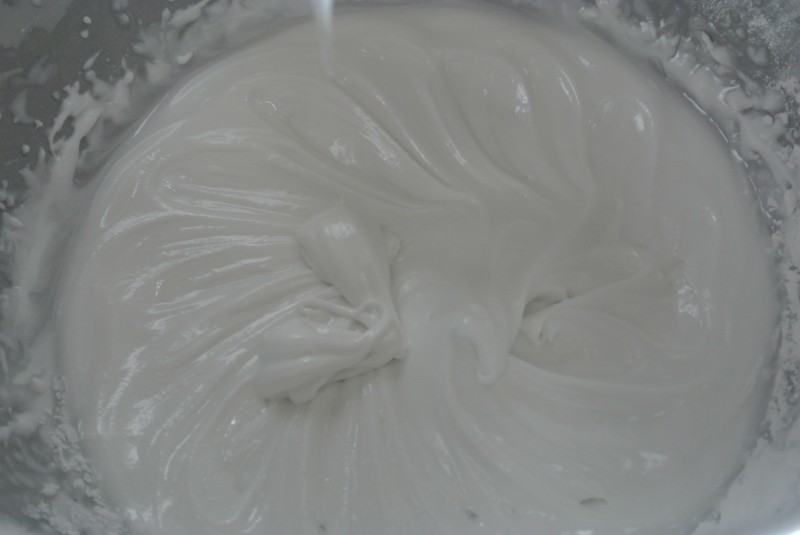
Whisk to combine…and then it’s really important to continue whisking until the royal icing thickens and forms soft peaks.
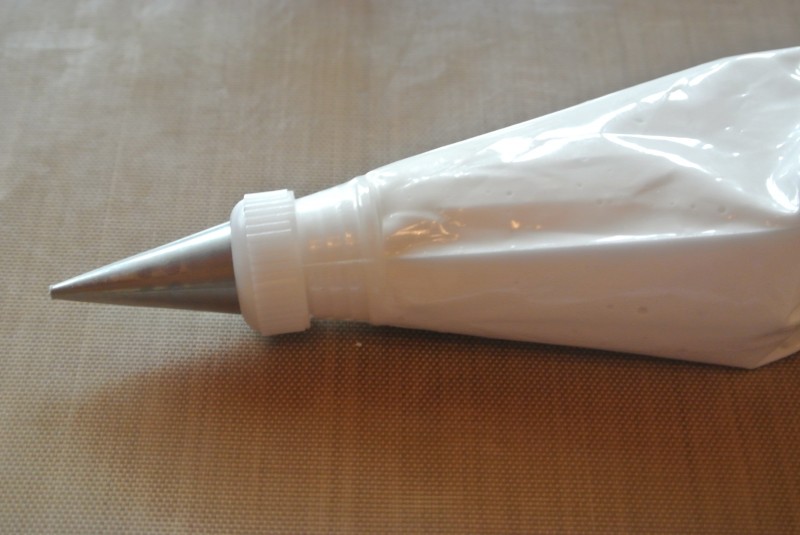
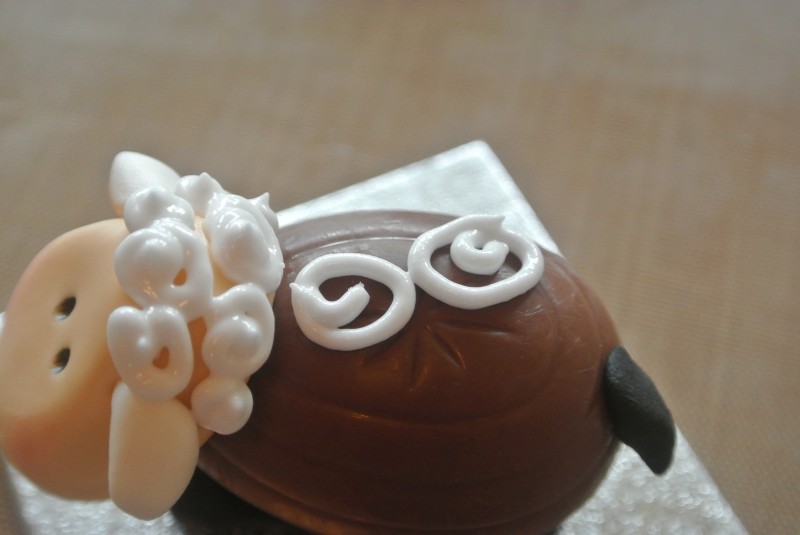
Into a disposable piping bag fitted with a no. 2 piping nozzle.
Pipe on small blobs of royal icing across Lamb’s forehead. Fill the back of the head with icing blobs right down to the chocolate egg.
Pipe swirls all over the chocolate egg.
Don’t worry about the gaps, fill them in with small dots of icing.
It’s easier to prop up the lamb to do the underside of the chocolate egg, simply use a ball of sugarpaste.
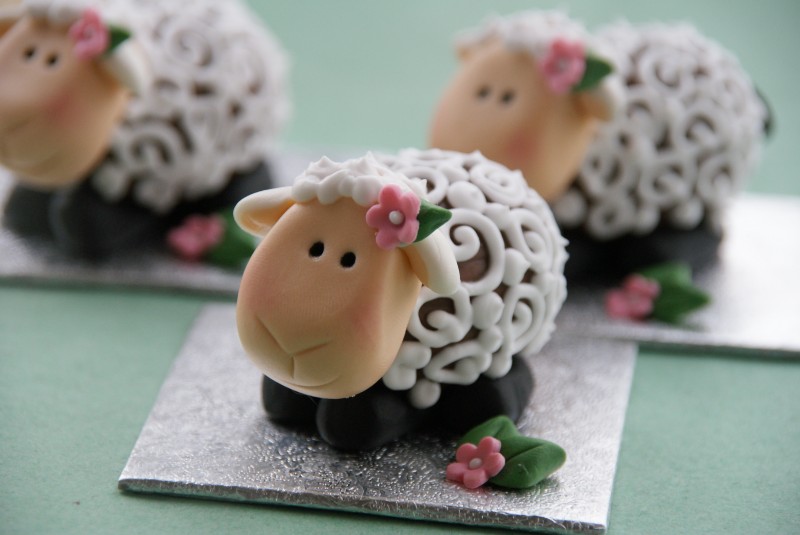
Woolly Lambs!
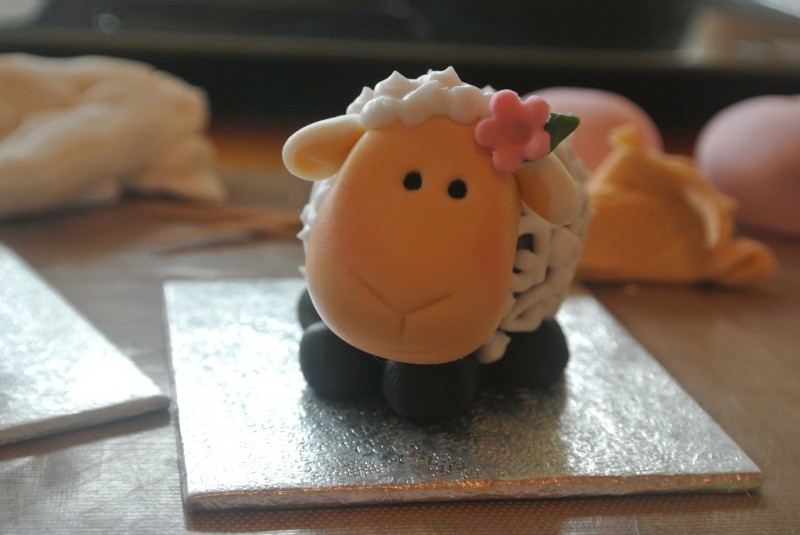
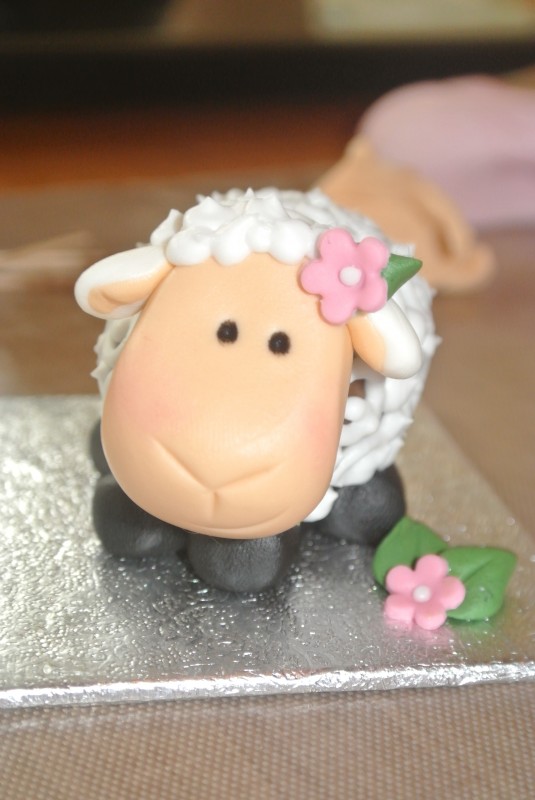
Cut out a small pink blossom and shape a little leaf from green sugarpaste and secure onto the lamb’s head using a dot of royal icing.
Shape two more leaves for by the side of the lamb – simply roll a ball of sugarpaste, flatten with your fingertip and pinch one end to a point, mark a central vein down the middle using a knife. Stick them by the side of the Lamb with a dot more royal icing.
Add a blossom to the leaves on the board and fill the centre of each flower with a small dot of royal icing.
Ready to go!
Easter Chicks are
here if you fancy giving them a go too.
Easter Lambs – Creme Egg Animals
 If you want to start gardening, it doesn’t necessarily mean you have to own a garden. This statement may sound a bit peculiar at first, but let us introduce you to Aquaponics and help you understand the concept of apartment gardening. The concept of Aquaponics is based on the creation of an environment where fish (talapia) interact with plants and create the much needed fertilizer for these to grow. The plants will also clear the water, so you don’t need to worry about the floating droppings. You can build such a system right inside your home, whether you live in an apartment or a house, but first you need to buy some PVC and drill a series of holes in them. Then connect the PVCs and use cups as planters. For the whole tutorial, watch the video below and bring a corner of nature right inside your home.